Thursday, May 12, 2011

WEEK 10 : come out with list of SCHEDULE,finalise the form


In today's class, I come out with a schedule for the rest of the week.


Diagram 1 : Schedule from week 10 until week 14


Diagram 2 : Perspective view of the model


Diagram 3: Editing the facade of the structure (highlighted in red color)

Friday, May 6, 2011

WEEK 9 :Edit the Form using 'CLOTH CONCEPT'

The previous model that I did during the interim is too solid, hence I made up my mind to delete the solid plane I created in the facade. Instead I tried to use the cloth concept to develop a more fluid facade, so that the new facade and the building look as in they are a a whole piece of structure.


Image 1 : The original model without adding in the solid facade

I am going to develop a new facade from this original structure. A piece of 'cloth' will be applied on top of this structure.


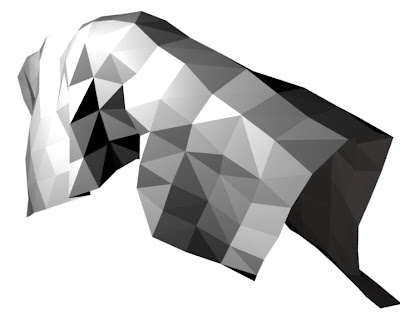
Image 2 : cloth applied on top of the structure

The cloth looks solid without the application of the modifier, 'subsurf'.


Video 1 : animation of the cloth applied on top of the structure


Image 3 : the surface of the cloth is smooth now with the application of 'subsurf' modifier


Image 4 : front view of the facade with cloth enveloping the structure

I go through more animation, trying to look for a suitable facade by adjusting both the position the structure and the 'cloth'.


Image 5 : the cloth is placed at the site of the structure so that it flows horizontally through the model.

I realised it looks better when the cloth goes horizontally through the building. This is mainly because my model is lied horizontally. Hence, it is good to have the whole structure goes in the same direction.


Video 2 : animation done with cloth placed at the side of the model


Image 6 : 'cloth' extract out from the model, red color indicated the facade of the building.

This is the view captured when the cloth is being animated at frame 53. I kind of decided to have this view as the facade for the building. However, I tried to put the cloth in edit mode so that I can made some adjustment to the cloth but to no avail.

Thursday, May 5, 2011

WEEK 9 : PROJECT 2 : CONTEXTUAL AND SPATIAL PARAMETERS


Image 1 : top view of the rapid prototype model


Image 2 : front view of the rapid prototype model


Image 3: Back elevation of the rapid prototype model


Image 4 : Final presentation board for project 2

Wednesday, May 4, 2011

WEEK 9 : PROJECT 2 : CONTEXTUAL AND SPATIAL PARAMETERS


IMAGE 1 : AXONOMETRIC PROJECTION OF THE BUILDING


IMAGE 2 : HORIZONTAL CROSS SECTION OF THE BUILDING


IMAGE 3 : VERTICAL SECTIONAL CUT THROUGH THE BUILDING


IMAGE 4 : BACK VIEW OF THE BUILDING


IMAGE 5 : PERSPECTIVE VIEW OF THE BUILDING


IMAGE 6 : TOP VIEW OF THE BUILDING


IMAGE 7 : ENTRANCE LEADING TO THE BUILDING


IMAGE 8 : FRONT VIEW OF THE BUILDING


SOME OF THE TOOLS EXPLORED DURING THE PROCESS


IMAGE 9 : WATER SIMULATION TEST


IMAGE 10 : TRAIN SITTING ON THE PATH


IMAGE 11 : PERSPECTIVE VIEW OF THE TRAIN SITTING ON THE PATH

USE BOOLEAN TOOLS TO CREATE SLITS ON THE ROOF


IMAGE 12: CREATE THIN BOXES ON TOP OF ROOF, READY TO BE BOOLEAN INTO SLITS


IMAGE 13: ONE OF THE SLITS CREATE ON TOP OF THE ROOF


IMAGE 14 : PERSPECTIVE VIEW OF THE BUILDING


IMAGE 15 : PERSPECTIVE VIEW OF THE INTERIOR

WEEK 9 : Project 2 : CONTEXTUAL AND SPATIAL PARAMETERS

After the animation, 'particles' area being converted in a series of 'hair' ready to be made into massing model.


Image 1 : a number of 'hair' generated from the folie


Image 2 : 'hair' ready to connect together to form faces


Image 3: massing model in edit mode


Image 4 : massing model in edit mode


Image 5 : massing model with a few surfaces selected


Image 6: First massing model

The wall curved inwards, and there is no wall formed underneath the first floor.


Image 7 : A wall is added underneath first floor

Edit the first model by adding in wall and at the same time remained the wall curved inwards.


Image 8 : third model

Delete the wall curved inwards and create a horizontal floor for first floor instead of the original one which is slanting. Also remained the exterior wall panel created in massing model 2, turned it into a glass wall, enabling the passerby to see what is happening inside the building.


Image 9 : main entrance of the building


Image 10


Image 11


Image 12 : cross section of the building done in belnder


Image 13 : first floor plan edited


Image 14 : ground floor plan edited


Image 15 : ground floor and first floor plan

Monday, May 2, 2011

WEEK 9 : Project 2 : Process on Generating The Final Form (2)

Series of images showing the different particles and hair generated from the animation in order to come out with a final form.


Image 1 : Hair moving towards Brisbane CBD where there are lots of commercial activities, yet at the same time the hair is being influenced by the force field on story bridge


Image 2 : Decrease the amount of hair to 5


Image 3


Image 4 : change the force field into a normal velocity of 2


Image 5 : change the normal velocity of the force field into 3


Image 6 : force field with the normal velocity of 4


Image 7 : force field with normal velocity 5


Image 8 : add in two more force field representing Hallow's School and Griffth University South Bank Campus


Image 9 : change the particles into series of hair


Image 10 : scene rendered with all the force field with negative value , -21


Image 11 : change the particles in image 10 into 'hair'


Image 12 : all the force field is -50


Image 13


Image 14


Image 15


Image 16


Image 17